Dark Souls Remastered Guide
Dark Souls Remastered
Dark Souls Remastered
- The basics
- Beginner's guide
- Bonfire kindling
- All rings and which are best for builds
- How to use magic
- walkthrough
- Where to go after ringing the first bell
- Bosses
- Boss order with DLC
- Asylum Demon
- Taurus Demon
- Bell Gargoyles
- Capra Demon
- Gaping Dragon
- Chaos Witch Quelaag
- Iron Golem
- Ornstein and Smough
- Moonlight Butterly
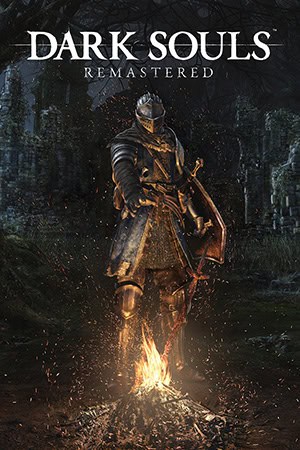
To me, Dark Souls Remastered is the easiest of all the Souls games, but it’s still very challenging and can be incredibly confusing for anyone new to the genre and gameplay style. My first playthrough was a complete mess as I had no idea what I was doing, but I’ve now sunk over 300 hours into the game across multiple playthroughs and builds. Since I know how hard Dark Souls can be for someone new to the series, I thought I’d prepare a guide that covers the majority of the basics, from bosses, classes, and weapons to where to go and so much more to help you a little bit.
Which class should I pick in Dark Souls Remastered?
You’re not locked into a class after selecting it at the beginning of the game. Classes only decide your starting stats and gear, so you’re free to build into whatever you want later on, so don’t overthink this too much.
That said, if you’re brand new to Souls games, I’d steer towards the Knight or the Warrior classes, since they both start with decent armour, high health, and equally distributed stats that you can tweak the build to how you prefer once you find weapons and attack styles you like.
The Pyromancer class is another good pick, since it allows you to specialise in magic, which are handy for ranged combat and, depending on the enemy, deal significant damage for a somewhat easier experience.
What to avoid as a beginner
Whatever you select, avoid starting with the Deprived class for your first go. It starts every stat at a flat 11 with barely any gear, which means you’ll deal barely any damage and will essentially be a walking feather. Players only ever start with this class when they want a challenge.
What are starting gifts and which should I choose?
After picking your class, the game asks you to choose a starting gift. This actually matters a bit more, since some of these are genuinely hard to get hold of later.
My go-to is the Tiny Being’s Ring – rings provide various effects and boosts. You can only equip two at any time, and they’re found throughout the game. The Tiny Being’s Ring increases your maximum HP by 5%, giving you a small starting boost to start with.
Other people tend to go for the Master Key, which unlocks a handful of shortcuts around the map that you’d otherwise need specific keys or a lot of backtracking for, and it lets you access areas in whatever order suits you.
If you’re starting your first playthrough, I feel that the Master Key can actually disrupt the natural order of the game, so I’d steer you towards the Tiny Being’s Ring and suggest you only select the Master Key on subsequent playthroughs or when trophy hunting.
What do the stats in Dark Souls Remastered actually do?
Levelling up can feel a bit overwhelming at first because none of the stats are explained in much detail. Here’s the short version of each stat and what they actually do:
- Vigor – This is your health pool. Levelling it increases your HP.
- Endurance – Your stamina, which controls how much you can attack, roll, or block before you’re left standing there defenceless. It’s just as important as Vigor in my eyes.
- Vitality – How much weight you can carry in equipment before you get slowed down (or worse, fat-rolling). I’d avoid levelling this unless you want to wear some of the game’s ridiculously heavy armour.
- Strength and Dexterity – These decide what weapons you can actually use and the attack damage you inflict on enemies. Check a weapon’s stat requirements before you fall in love with it, as they’ll normally require more of one stat over the other.
- Attunement – This decides how many spell slots you have. It’s only worth investing in if you’re using sorceries, miracles, or pyromancies.
- Resistance – Largely considered one of the weaker stats in the game, increasing your resistance to effects like poison. I wouldn’t bother putting points here.
- Intelligence and Faith – These power sorceries and miracles respectively, only relevant if you’re building a caster. If you are, you’ll also need to invest in Dexterity (Increases casting speed) and Attunement (Spell slots).
If you’re not sure what build you want yet, just pump early levels into Vigor and Endurance, and the stat needed to use your chosen weapon.
Weapon scaling
All weapons scale with a stat: most weapons will scale with Dexterity or Strength, while flames, catalysts, and talismans all scale with other stats like Intelligence and Faith.
There are six tiers of scaling: E, D, C, B, A, and S, with S being the best and E being the worst. The higher the levelling of scaling, the more of a boost your weapon will get and the more damage you will deal to enemies as a result.
As you level up your weapon, the scaling will increase, so always pay attention to weapon scaling and increase its respective stats.
You can view weapon scaling by analysing any weapon through the in-game menu.
What is Humanity, and why does it matter?
You start the game Hollow, which means undead. Humanity is the item that reverses this, and it does a few things at once: it restores your human form, boosts your item discovery rate, and lets you kindle bonfires for extra Estus charges.
Being human also means you can be invaded by other players when playing online or NPCs when playing offline. If you want to avoid invasions, try to avoid playing in human form, but you will need to restore humanity to increase your Estus Flask charges, particularly later in the game when you’re facing tougher enemies and bosses.
How do Estus Flasks work?
Estus Flasks are your healing item, refilled every time you rest at a bonfire. You’ll grab it during the tutorial at the Asylum from Oscar of Astora, but you’ll only have five charges at the start, which never feels like enough, but you can increase that number by Kindling a bonfire using Humanity once you’ve unlocked the Rite of Kindling by defeating Pinwheel.
Prior to defeating him, you’re able to increase your Estus Flask charges to 10, and then to 15 and a maximum of 20 once the Rite has been unlocked.
I’ve found that Kindling the bonfire closest to a major boss, particularly if they’re proven to be difficult, works best. A large portion of the game can be completed without the Rite of Kindling, since it’s located in a tough area for new players, so try to stick to five or 10 Estus Flasks when possible.
It’s also worth noting that bonfires stationed beside a Fire Keeper will always grant you 10 charges by default.
How does weapon and armour upgrading work?
Upgrading weapons make a bigger difference than levelling in the early game. There are two types of upgrades:
- Reinforcement: This increases your weapon by incremental upgrades (+1 then +2 and +3 and so on).
- Ascension: This changes the weapon’s state and unlocks a new tier of reinforcement, like from +5 to +6 and onwards.
Basic weapon upgrades can be done at Bonfires using the Weapon Smithbox option once purchased, but you’ll mostly need to rely on the game’s various Blacksmiths:
- Blacksmith Andre: Located in the Undead Parish
- Blacksmith Rickert of Vinheim: Located in New Londo Ruins
- Giant Blacksmith: Located in Anor Londo
- Blacksmith Vamos: Located in the Catacombs
Each Blacksmith specialises in different types of upgrades, so don’t expect to be able to completely upgrade your weapons and armour via one Blacksmith.
You cannot ascend weapons using the Weapon Smithbox. When you do ascend weapons, you can choose the type of upgrade once you have the required gem. The different paths are as follows:
- Regular: Regular upgrades through to a maximum of +15.
- Raw: Increases a weapon’s base damage but removes all scaling.
- Lightning: Weapon deals lightning damage.
- Crystal: Weapon deals more physical damage, relying on Strength and Dexterity stats.
- Magic: Weapon deals magic damage, scaling on Intelligence but reducing scaling on Strength and Dexterity.
- Enchanted: Weapon deals more magic damage than Magic weapons. It scales on Intelligence, but reduces scaling on Dexterity and Strength.
- Divine: Weapon deals magic damage scaling on Faith, but reduces scaling on Dexterity and Strength.
- Fire: Weapon deals fire damage but all scaling is removed.
- Occult: Weapon deals magic damage scaling on Faith, but reduces scaling on Dexterity and Strength.
- Chaos: Weapon deals fire damage that scales with Humanity but has no physical stat scaling.
The earliest Blacksmith you’ll come across will be Andre at the Undead Parish, who you can purchase the Weapon Smithbox from. Do it, so you can keep your weapon upgraded throughout your journey.
Weapons and armour are upgraded using items known as Titanite Shards. There are several types available in the game, including:
- Titanite Shards: Used to upgrade early game weapons and armours
- Large Titanite Shards: Used to upgrade mid-tier weapons and some specialised weapons
- Titanite Chunks: Used for penultimate weapon and armour upgrades and some specialised weapons
- Titanite Slabs: Used for final weapon and armour upgrades and specialised weapons
Titanite can be found and bought, but the higher the tier, the harder it is to find, and Titanite can only be bought from Blacksmiths once you find and deliver various Embers to the respective Blacksmith.
Again, not all Titanite materials are available with one Blacksmith, you’ll have to visit each of them as needed for all of your upgrading needs.
What about armour?
Armour upgrades are a lot more simplistic. Upgrading armour increases its effectiveness, and you can upgrade armour at a Blacksmith or at a Bonfire after buying the Armor Smithbox.
Armour can only reach a maximum level of +10, but, depending on the type of armour (Whether it is light or heavy), you’ll need a varying amount of Titanite material.
Where should I go first in Dark Souls Remastered?
From Firelink Shrine, the intended early path is up towards the Undead Burg and Undead Parish. Don’t be tempted to head down into the Catacombs or towards Blighttown this early, both areas are notoriously brutal for a first-timer and not where the game wants you to go yet, no matter how curious you are.
Once you reach the Undead Parish, you’ll encounter a small surprise. From there, Sen’s Fortress and eventually Anor Londo are your next major milestones. I won’t spoil what’s after that, half the fun of this game is stumbling into it yourself.
What are covenants, and do I need to worry about them early on?
Covenants are essentially factions you can join that shape your multiplayer experience, some let you invade other players, others let you help them, and some just grant unique rewards for completing tasks. As a beginner, I really wouldn’t stress about these on your first playthrough. Most are entirely optional and won’t affect your ability to finish the game.
If you do want to dip your toes in, the Way of White covenant (available from the start at Firelink Shrine) is the gentlest introduction, since it’s mainly built around cooperative play.
Does Dark Souls Remastered come with DLC?
Dark Souls Remastered comes with the Artorias Of The Abyss DLC, which was released in 2012. The DLC adds new weapons, rings, armour, spells, and NPCs, as well as five new locations to explore and four challenging, but some of the best in the entire game, bosses.
How to start the Artorias of the Abyss DLC
Starting the DLC is a bit of a hassle as it involves backtracking to several previous locations and fetching certain items before speaking with an NPC.
You’ll need to start the Dark Souls DLC before completing the game, as doing so will immediately push you into New Game +. Before you can start anything, you’re going to need to head to Darkroot Basin and defeat the Hydra monster. Be careful when doing so, as you can easily fall into the water, so either bait its head slams or use ranged attacks to defeat it.
Once done, either warp out of the area and back in or quit and reload the game to reload Darkroot Basin to trigger an NPC. Then, hugging the left-hand cliffside by the Hydra lake, follow the lake until you spot a golden crystal golem. Defeat it, and an NPC known as Dusk of Oolacile will appear in its place. Speak with Dusk, and then she will leave.
After that, fast-travel to the first bonfire at Duke’s Archives and take the elevator up. When you emerge into a new room, you’ll be at the entrance to the Duke’s Archives. In the room will be several crystal enemies and a large crystal golem. Defeat the smaller enemies and then defeat the golem, who will drop the Broken Pendant (Only available after freeing Dusk of Oolacile).
With the Broken Pendant, head back to Darkroot Basin where you fought the golden golem, and in its place will be a portal. Examine it to trigger a cutscene and warp you to the first location of the DLC: Sanctuary Garden.
Any final tips for beginners?
To give you a little more of a boost, here are a few tips I picked up the hard way that I’ll pass on to you:
- Rolling has invincibility frames right at the start of the animation, so learn the timing rather than panic-rolling away from everything, that’s usually how you end up rolling straight into another hit. Keep an eye on your stamina bar too, an empty bar mid-fight leaves you completely open.
- Parrying and backstabs deal huge damage once you get the hang of them, but don’t feel like you need to master them straight away, blocking and patient trading works perfectly well for most of the game.
- When walking into a new area or turning a corner, walk in with your shield raised to avoid being on the receiving end of a bad surprise attack.
- If you die to something, try to notice what actually went wrong rather than just running back in. Every boss in this game has a pattern, and the moment it clicks is one of the best feelings in gaming.
Take your time with Dark Souls. It’s not a game you rush, and some of my favourite gaming memories came from just wandering around Lordran figuring things out for myself.